Saturday, December 29, 2012

Crazy Awesome Guilt-Free Spinach Artichoke Dip

Because this dip is made with a silken tofu base and NOT a cheese or cream base, you can eat the entire thing and not feel guilty at all.  It's baked in the oven so it's warm and melty and delicious, and I bet if you bring it to a party and don't tell anyone it's vegan, they wouldn't even know.

Baked Spinach Artichoke Dip

Ingredients:
Dip before going in the oven
-1 small yellow onion, diced
-1 (12 ounce) packages frozen chopped spinach (thawed, drained and squeezed dry)
-1 (8 ounce) jar marinated artichoke hearts, roughly chopped
-1 tablespoon olive oil
-1 (12 ounce) packages firm silken tofu
-1/2 cup nutritional yeast flakes
-3 garlic cloves, roughly chopped
-2-3 tablespoons apple cider vinegar
-1 teaspoon dried basil
-1 teaspoon dried parsley
-1/4 teaspoon cayenne pepper
-1 teaspoon salt
-1/2 teaspoon black pepper

Method:

Preheat oven to 350°F.  Saute onion, spinach and artichoke hearts in olive oil until onion is soft, about 8 minutes.  Blend together tofu, nutritional yeast, garlic, vinegar and spices in blender or food processor until mixed and very smooth.

Combine the smooth base from the blender and the onion/artichoke/spinach mix in a bowl.  Taste and add extra seasonings and nutritional yeast, as needed.  Smooth into non-stick baking dish and bake for 15-20 minutes, or until lightly browned on top.  Serve warm with bread. 

Monday, December 10, 2012

Simple Potato Latkes

These were so easy to make and yielded enough for cute little bite sized appetizers or a meal for 2-3 adults.

Simple Latkes (Potato Pancakes)

Ingredients:
-2 lbs potatoes, peeled and shredded
-1 large yellow onion, peeled and shredded
-1 tsp salt
-1/4 cup flour
-1/2 tsp fresh pepper
-2 tbsp chopped parsley
-1/2 tsp baking powder
-vegetable oil or sunflower oil for frying
-applesauce for garnish!

Method:

Place a colander on top of a large bowl and put the shredded potato and onion in there.  Using your hands, squeeze out as much liquid as possible.  When the mixture is as dry as possible, transfer it to another bowl and add the flour, baking powder, salt, pepper and parsley.  Mix thoroughly.

Meanwhile, preheat the oven to 275F.  Place a large skillet with about ½” of oil on the stovetop over medium heat.  Once the oil is hot, take a heaping tablespoon of the latke mixture into your hands and lightly flatten it into a disc.  Place it lightly into the oil and repeat.  I put about 4 latkes into the oil at once, so as not to overcrowd them.  Let them sit for about 4-5 minutes, until golden on the side which is down, then flip gently and let sit for another 4-5 minutes.  

When they’re done, transfer to some paper towels to absorb some of the oil, then transfer to an oven-safe dish and put in the oven to keep warm.  Keep this up in batches.

Serve with applesauce and a garnish of parsley!

Thursday, December 6, 2012

Vodka-Dijon Mustard Roasted Potatoes

These were some of the best roasted potatoes I have ever eaten.  I guarantee they are different than almost any you have eaten either.  I adapted the recipe from the New York Times’ recipe which they included in their 2011 Vegetarian Thanksgiving series.

Vodka Dijon Roasted Potatoes

Ingredients:
Crusty Delicious Goodness
-2 lbs. roasting potatoes of your choice (I used red-skinned), with skin on and cut into 1” chunks
-1/3 cup + 1 tbsp. Dijon mustard
-1/3 cup extra virgin olive oil
-2 tbsp. vodka
-1 tbsp. dry vermouth
-1 ½ tbsp. horseradish
-2 cloves garlic, pressed
-1 tsp. paprika
-1 tsp. kosher salt
-pepper to taste
-1 tsp. caraway seeds (whole seeds, not ground)
-1/4-1/2 tsp. cayenne pepper
-1 tsp. dried red pepper flakes

Method:

Preheat oven to 400F.  In a large bowl, whisk together all ingredients except potatoes.  Add in the potatoes and toss with your hands to coat.
Potatoes coated with the sauce
Pour the potatoes onto a baking sheet and make sure they are spread out in a single layer.  Roast for 50-55 minutes, tossing with a spatula every 15 minutes or so.  They should be a little crusty on the outside and tender throughout.
Extreme close up!


Cranberry Oatmeal Muffins

This week is so dreary, rainy, and snowy in Germany and I was in the mood for something warming and autumnal.  I had a big bag of frozen cranberries in the freezer so I decided to make these muffins, and they turned out great!  The cranberries definitely are little bursts of tartness because they are real cranberries and not candied or dried ones.  I suppose you could substitute any kind of frozen berry, and also you could add nuts!

Cranberry Oatmeal Muffins

Ingredients:
-2 cups oats
-2 cups almond or soy milk
-2 tsp vanilla
-1 cup flour
-1 cup spelt flour
-1 tsp cinnamon
-2 tsp baking soda
-2 tsp baking powder
-1 tsp salt
-1 cup sunflower oil
-1/2 cup applesauce
-1 cup brown sugar
-1 ½ cups frozen cranberries
-1 cup pecans (optional)

Method:

Preheat oven to 400F.  In a large bowl, mix vanilla and soy milk and let stand for a minute or two.  Then add in the oats and set aside.

In a medium bowl, whisk together the flours, baking soda, baking powder, and cinnamon to thoroughly blend. 

Going back to the milk/oats bowl, add in the oil, sugar, and applesauce and mix to blend.  In batches, add in the dry ingredients to the large bowl, mixing only to blend and not overmixing!  Fold in the cranberries (and nuts if using). 

Fill muffin cups almost to the top, and bake for 20 minutes until the muffin tops have browned slightly.  Makes 24-28 muffins.

Monday, December 3, 2012

Dark Chocolate Peanut Butter Cups with Coconut

If you're like me and like playing around with chocolate and other ingredients for homemade candy around this time of year, you'll enjoy this recipe. So few ingredients and the result is outstanding! For the best results, I highly suggest using a silicone mini-muffin "tin" or at least the little silicone muffin cups fit into your metal muffin tin. Silicone makes the chocolate so easy to pop out once it's set. I would not recommend trying this with just a metal tin, but paper muffin liners may work if you're feeling adventurous.

Dark Chocolate Peanut Butter Cups with Coconut

Finished product
Ingredients:
-1 cup of dark chocolate chips or chopped up dark chocolate
-peanut butter of your choice (I used the Earth Balance coconut peanut butter)
-shredded coconut

Method:

Over a double boiler, melt the chocolate chips until completely melted but not burnt. (Or, you could do this in the microwave very carefully, on a lower setting, stirring frequently so as not to burn.)

Using a small brush or a little espresso or dessert spoon, gently spoon 1-2 tsp of chocolate into each mini-muffin container and, using the spoon or brush, "paint" chocolate up the sides to coat all around each cup form. Then put the whole thing in the fridge for an hour to set.

1st step - chocolate in the molds, set in fridge
After it's solid, take your peanut butter and microwave it very slightly - not so it is liquid-y, but just a little more soft/smooth than usual. Using a teaspoon, fill each muffin cup so that they are now 3/4 full. Then go back to your melted chocolate (mine was still pretty melty but if yours needs another 30 seconds in the microwave, that's fine) and gently spoon the chocolate over each muffin cup right about to the top. Make sure all the peanut butter is covered up.  Then sprinkle a little coconut over each cup into the chocolate.

Ready to go back in the fridge after filling

Return to the fridge and let set for another 60-90 minutes. Pop them out of the molds when done and enjoy! If you're not eating/serving right away it might be best to keep them in a Tupperware container in the fridge.

My New Favorite Product

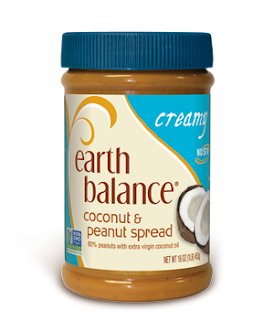
As anyone who knows me well knows, I love peanut butter and have probably a hundred recipes in which I use it.  I recently tried this Earth Balance Coconut Peanut Butter and I LOVE it.  It is just as creamy as non-organic peanut butters like Jif or Skippy, and it has a slight coconutty taste.  It's delicious on bread or toast, delicious in baked goods, and delicious in homemade candy (see tomorrow's recipe!)  And it's gluten-free, GMO-free and organic.

Unfortunately it isn't sold in Germany but if you live in the US, go buy some right now!! And buy some to mail to me!

Photo courtesy of Earthbalancenatural.com

I'm Back! With Coconut Butternut Squash Soup!

Sorry for the long absence - traveling!

I tried this recipe from Sonnet's blog "For the Love of Food" and it turned out great just AS IS! I almost always fool around a little bit with the recipes but I was jetlagged and could barely read straight so I didn't trust myself to not mess it up! The original is here:

Coconut Butternut Squash Soup

Ingredients:
-1 medium butternut squash (peeled and cut into 1" cubes)
-3 tbsp. coconut oil
-1 medium yellow onion, diced
-3 cloves garlic, minced (ok I only used 3 cloves because somebody in my house doesn't like things too garlicky. Original calls for 4 cloves)
-1 can garbanzo beans, drained and rinsed
-5 cups vegetable broth
-1/2 can of coconut milk (be sure to shake can before pouring)

Method:

Preheat oven to 375F, rub squash cubes with 2 tbsp of coconut oil, pour them onto a baking sheet and roast for 35 minutes. 1-2 times in that 35 minutes, take them out and use a spatula to flip them over and turn them around a bit.

Pour 1 tbsp coconut oil into a large soup pout over medium heat and saute the onion for about 5 minutes. Add garlic and saute another 1-2 minutes. Add the roasted squash, beans, vegetable broth and coconut milk and simmer for about 10 minutes.


Remove from heat and let cool a little bit, then pour into a blender in batches and blend completely. When each batch is done, pour into a big bowl. After all the soup has been blended, pour it back into the big pot and put it back on the stove over low heat to keep it warm, and serve!

(An idea: If you like even more beans, after everything is blended add a can of white beans [drained and rinsed] to the soup for a little more chew.)

Wednesday, November 14, 2012

Crispy Kale Chips


Believe it or not these are super crispy!!

Sometimes I just feel like snacking on something salty but I am loathe to sit down with a bag of potato chips because I know I won't be able to stop after just the one serving. (BTW who makes the serving sizes nowadays? I am not a big girl but I eat WAY MORE than 8 chips in a sitting...) So this week, after FINALLY finding kale in my market, I decided to experiment with kale chips. I have bought them from health food stores before but they are really expensive and I can't find them anywhere in Europe. Anyway, the experiment was a success and it is really easy to do. I love having a snack which is really healthy for you (did you know 1 cup of kale has 1327% of your daily vitamin K, 354% of your vitamin A, 89% of your vitamin C, 10% of your fiber, and 5% of your protein?) and still salty and crunchy. And, I swear, it doesn't taste like "vegetables."

Crispy Kale Chips

Ingredients:
-lots of kale (washed)
-salt
-olive oil
-any other seasonings you want (powdered)

Method:

Preheat oven to 300F. After washing the kale, you should make sure it is REALLY dry. This is because if there is even a little water on them when they go into the oven, it will produce steam and that will result in wilted kale chips instead of crispy. To do this, I tore the kale into roughly 2" segments (discarding the large spine in the middle) and laid them out in single layers on paper towels. Then I put more paper towels on top, added more kale pieces, more paper towels, etc and let them sit like that for a while, gently patting.

Then once they're dry, place them in a single layer on a baking sheet and pour about 1 tbsp olive oil over them, as well as a healthy sprinkling of salt (and whatever other spices you want, such as onion powder, garlic powder, paprika, etc). Now here is the key - unlike with other roasting veggies, you really need to use your fingers and pick up each leaf and massage the oil and salt into each one to ensure it's oiled up nicely and shiny. (Not dripping with oil, just a light sheen.) This is because without the oil and salt the leaves will just go really dry and not taste very good. 

About to go into the oven - oiled and salted up

Put the baking sheet in the oven for 15 minutes. Remove, let cool slightly on a rack, then carefully remove each leaf with your fingers (not a spatula!) and lay on some paper towels to absorb any extra oil. I needed to do a few baking sheets worth because I had a lot, and they do need to be in a single layer. You won't believe how crispy they are when they come out of the oven!
Finished product - crispy and salty

Tuesday, November 13, 2012

Maple Pumpkin Oatmeal

This is a little variation on the oatmeal recipe I put up several weeks ago - it's perfect for fall, especially if you have fresh pumpkin (i.e. not canned). If you need to use canned, a plain one is best (no seasonings - not pumpkin pie filling). Also, I used walnuts in mine but I think pecans would be great too!

Maple Pumpkin Oatmeal

Ingredients:
-3/4 cup pumpkin puree
-1/2 cup rolled oats
-1 cup almond milk
-1 tsp cinnamon
-1/2 tsp nutmeg
-dash salt
-1 tsp vanilla
-1/4 cup pecans or walnuts
-maple syrup (as desired)
-raisins (optional)


Method:

Heat pumpkin puree in a small saucepan over medium heat for 5 minutes. Add oats, almond milk, cinnamon, nutmeg, and salt (and raisins if using) and bring to a low boil just for a few seconds, stirring. Then turn heat down to a low simmer and cook, stirring frequently, for 8-10 minutes, until oatmeal has absorbed a lot of the liquid and is cooked through. Remove from heat, stir in vanilla, pour into a bowl. Top with nuts and as much maple syrup as desired.

Yum!
Extreme close up!

Monday, November 12, 2012

Creamy Rosemary Potato Leek Soup

One of my favorite things is really creamy soup... and I always felt guilty about eating it even before I was vegan because it just seemed like so much fat in the heavy cream, and the butter, etc etc. So when I find a recipe for a soup which turns out to be rich and creamy WITHOUT the cream and butter/oil, I jump on it. This recipe is really rich and very flavorful - and easy with not too many ingredients. Great flavors for fall.

Extreme close up!
Creamy Rosemary Potato Leek Soup


Ingredients:

Soup, after pureeing, simmering on stove

-2 large Russet potatoes, or 6-8 small roasting potatoes, unpeeled, scrubbed well, and roughly cut into 1-2" cubes
-2 small yellow onions, or 1 large one, peeled and roughly chopped
-3 leeks (white and light green parts only), washed and sliced
-4 cups vegetable broth
-1 tbsp olive oil
-3 garlic cloves, minced
-1 tbsp fresh chopped rosemary
-1 tsp chipotle powder, or 2 tsp chipotle Tabasco sauce
-1 tsp apple cider vinegar
-salt and pepper to taste

Method:

Heat olive oil in a large pot over medium-high heat and add onions and leeks. Stir for about 5-6 minutes until soft and fragrant. Add garlic and stir for another minute or so. Then add the veggie broth and potatoes, turn up to a boil, and then stir and turn down to a low simmer. Let simmer for 20 minutes, until potatoes get soft. At this point, add the rosemary, a dash of salt and pepper, and stir.

Remove from heat and let cool just a little so it's not very hot. At this point, put another pot on the stove which is big enough to hold all the soup (or if you don't have one, put out a big bowl that can hold it all). Bring the soup pot near where your blender (or food processor) is and ladle the soup into the blender about halfway full. Blend until well pureed. Then pour the pureed soup into the other pot/clean bowl you have put out, and repeat with the rest of the soup in batches. If you like some chunks, don't puree the last batch and just mix it back into the pureed soup.

Put the soup back on stove on a low simmer and add apple cider vinegar, chipotle powder, and salt and pepper to taste. Serve hot with bread!
Finished product

Sunday, November 11, 2012

Dark Chocolate-Coconut Brownie Bars

"This is the best dessert you've ever made." -my live-in recipe tester
This recipe is pretty decadent - not necessarily the healthiest dessert recipe but definitely one of the most delicious I have had in a while.  You can eat the finished product a bit warm, with your favorite vegan ice cream on top, or just like a cookie bar or brownie.

Dark Chocolate-Coconut Brownie Bars

Ingredients:
Out of the oven
-2 cups flour 
-3/4 cup softened vegan butter (like Earth Balance or margarine)
-1 tsp baking powder
-1 tsp vanilla
-2 cups brown sugar
-3/4 tsp salt
-3 egg replacers (1 tsp ground flax and 1 tbsp water per egg, or Ener-G, or another store bought egg replacer)
-1 1/3 cup dark chocolate chips
-1 cup shredded coconut
-1/2 cup pecans or walnuts (optional; I didn't use)

Method:


All ingredients mixed together
Preheat oven to 350F and grease a 9x13" glass Pyrex dish and set aside.

Mix together the softened (almost liquid) vegan butter, egg replacers, brown sugar and vanilla in a large bowl.

Add the baking powder and salt and combine well.  Then add flour and combine.  Then stir in chocolate chips and coconut (and nuts if using).

Spoon the dough into the baking dish and use a large spoon or spatula to pat down evenly.  Bake for about 35 minutes and cool on a rack.  Serve!


Dough patted down and ready for the oven

Friday, November 9, 2012

Garlic-Baked Sweet Potato Fries

I like my sweet potato fries about the size of my fingers and WITH the skin on.  The skin is really good for you and also gives a little texture and crunch.  This is the best recipe I have tried for sweet potato fries and makes the kitchen smell great!

Garlic-Baked Sweet Potato Fries

Ingredients:

-2 very large sweet potatoes
-1 1/2 tsp garlic powder
-1 1/2 tbsp olive oil
-1 1/2 tsp kosher salt
-1/2 tsp freshly ground pepper
-1/2 tsp onion powder

Method:

Preheat oven to 400F.  Cut potato lengthwise into strips/fries about 1/2-3/4 inch wide and keep them long (don't cut the potatoes width-wise or in half).  Pour them into a large bowl, pour the olive oil and spices all over and mix it up to coat with your hands.

Spread over 2 baking sheets (ungreased) so that each fry is not touching any other fry.  Bake for 20 minutes, then take out and shake the baking sheets to "flip" the fries.  Turn the oven down to 350F and put baking sheets back in the oven for another 10 minutes (watch to see how dark they're getting toward the end so they don't burn).

Take them out and pour the fries onto a plate covered with paper towels.  Enjoy!  I love dipping sauces but these were so flavorful they didn't need any!

Thursday, November 8, 2012

Creamy Curry Coconut Corn Soup

This soup has so few ingredients and takes so little time, you can throw it together in minutes - maybe even with things you already have in your kitchen.  It is warming and great served over rice to make an even thicker kind of chowder.

Creamy Curry Coconut Corn Soup

Soup over rice

Ingredients:
-1 large white onion, peeled and roughly chopped
-2 tbsp curry powder
-1 can (400 ml) coconut milk (tryto find one with the highest percentage of coconut and a lower percentage of water)
-2 1/2 cups of vegetable stock
-4 cups corn kernels (I used organic canned)
-1/4 tsp cayenne pepper
-salt and pepper to taste
-rice of your choice (optional)

Method:

In a medium soup pot, water stir fry the chopped onion (this means to cook the onion over medium heat with 1-2 tbsp water - just enough to prevent it from sticking to the pot).  Cook until soft, maybe 5-8 minutes.

Meanwhile, put the curry powder in a small nonstick pan and dry-roast it over low-medium heat for about 5-6 minutes to bring out the flavor.  Shake the pan every couple minutes to move the powder around.

Add the vegetable stock, corn, and curry powder to the onion in the soup pot.  Bring to a boil over high heat, then turn down to a simmer and cook over low heat for 10 minutes.

Then add the can of coconut milk and cayenne pepper and stir together.  Taste and add salt/pepper if needed.  Serve over rice or alone!

Wednesday, October 31, 2012

Pecan-Date Oatmeal Stuffed Baked Apples

This is a great healthy dessert recipe that can even be made as a breakfast - and when it's in the baking dish right out of the oven it looks so beautiful (I just forgot to take pics at that stage!) I used Granny Smith apples for a tart twang, but it would be equally good with a sweeter apple, as long as it's a crisp apple, not mushy like red delicious variety. Pink Lady or Honeycrisp would be good varieties, I think.

One serving of the dish, reheated with a little almond milk on there to moisten it up

Pecan-Date Oatmeal Stuffed Baked Apples

(This recipe would serve 4 for dessert or 2-3 for a hearty breakfast. If you want to make breakfast for a family of 4 I would double the recipe.)

Ingredients:
-2 large baking apples, skin left on but cored
-1 cup oats
-1 tsp cinnamon
-1/2 tsp ground nutmeg
-5-6 Medjool dates, pitted and chopped (if you don't like dates or don't have them, you can sub dried apricots or even raisins)
-1 tbsp ground flax
-1/3 cup chopped pecans (or hazelnuts would also work well here)
-1 1/2 cups almond milk
-1 tsp vanilla
-3 tbsp brown sugar mixed with 1 tbsp margarine or vegan butter (optional)
-2 tbsp maple syrup (optional)

Method:

Preheat oven to 350F. Wash and core apples so that there is enough room in the core for stuffing. Lightly oil a baking dish (I used sunflower oil on a 9" square Pyrex dish).

In a bowl, mix together all the other ingredients (except for optional brown sugar mixture and maple syrup). Using a spoon, stuff apple cores with the oatmeal mixture and then pour the remaining oatmeal all over and around the apples.

Put in oven for about 30-35 minutes. **At this stage, if you want a sweeter dish (maybe only if using for a dessert?) mix together 1 tbsp melted margarine and 3 tbsp brown sugar and drizzle this over the whole thing when there's about 10 minutes left on the oven timer. Or, skip this and when the dish is done, drizzle some maple syrup over it.

(Note: I found this dish was sweet enough for breakfast without additional sugar/maple syrup. But for a dessert, I definitely preferred some extra sweetener on there.)

Extreme close up! Gooey baked apple and nutty delicious oatmeal.


Monday, October 29, 2012

Roasted Cherry Tomato Soup with Herbs

I think that roasting almost anything makes it so much more delicious and brings out the concentrated flavors so well, with so little effort on the cook's part. This soup is almost completely comprised of roasted cherry tomatoes (or other small vine tomatoes) and tastes great. You will definitely need a blender or food processor to do it though. Also - it sounds like a lot of tomatoes but this amount yielded enough for about 4 large bowls.


Roasted Cherry Tomato Soup with Herbs

Ingredients:
-4 lbs. cherry tomatoes, or other small vine tomatoes - washed and removed from vines
-2 sweet onions, peeled and chopped into large sections
-4 tbsp. dried Italian herbs (inc. basil, oregano, rosemary)
-handful of sprigs of fresh thyme
-1 tsp. sea salt
-4 tbsp. lemon juice
-8 tbsp. olive oil (a good one if you have it)
-5 cloves garlic, peeled but left whole
-1 tbsp. vegan butter (or margarine)
-1/4 tsp cayenne pepper
-fresh ground black pepper, to taste

Method:

Preheat oven to 400F. In a roasting pan, spread out tomatoes and onion in one layer. If you have too many, you might have to roast in 2 batches, as I did. Pour 1/2 the olive oil and 1/2 the lemon juice over the tomatoes/onion if you're roasting in 2 batches. (If you can fit all the tomatoes/onions in one layer of your pan, then 1 batch is fine, then just put all the olive oil, lemon juice, garlic and herbs in one pan instead of splitting them between the 2.) Rub the oil and lemon juice on the tomatoes and onions with your fingers to ensure somewhat even distribution. 
 
Tomatoes, onions, herbs and garlic BEFORE roasting

Then sprinkle the salt and dried herbs over the tomatoes/onions and stick in the garlic cloves and sprigs of thyme. Sprinkle some cracked pepper on top of the whole pan and put in the oven for 20 minutes, or until the onions are very soft. Remove the pan from the oven and remove the onions from the pan with tongs and set them on a plate to cool. Put the roasting pan back in the oven for another 20-25 minutes. Your tomatoes should look a little browned, shriveled, and popping open - but not burned. At that point, remove the pan and set on a rack to cool for a bit. At this point, remove all the thyme stems and throw them away.

Tomatoes, onions, herbs and garlic AFTER roasting

Put the vegan butter/margarine, onions and the tomato mixture from the roasting pan (along with all the oils/juices!) into a food processor or blender, and blend until very smooth. You will probably have to do this in 2 batches as well unless you have a seriously large blender. It's ok if the batches don't have even amounts of herbs/oil, etc because you're going to transfer all of it into a soup pan on the stove to keep warm and add the final ingredient - a little cayenne. At that point it will all become mixed and blended well.

Once it's simmered on the stove for a bit, serve!
Extreme close up